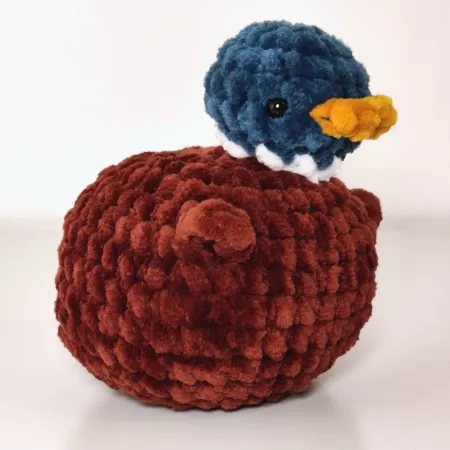
Mallard Duck 🦆
A more true-to-life take on my Chunky Ducky pattern — swapping the classic rubber-duck yellow for a mallard's real colors: an iridescent green head, a warm chestnut-brown body, a crisp white neck ring, and a mustardy bill. Same quick, beginner-friendly amigurumi base as the original, just recolored to look like the real thing.
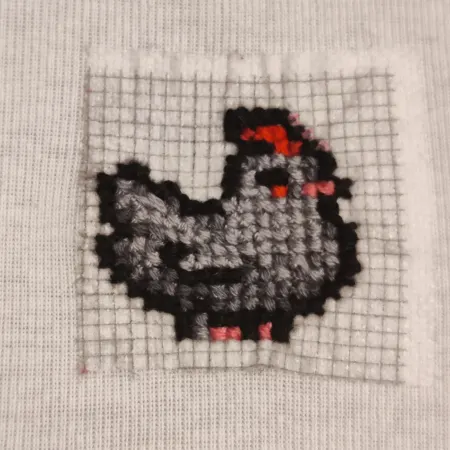
Void Chicken
I really wanted to try cross-stitching on a shirt for the first time. So I asked my bf for an old shirt and for something he would like embroidered on it. He chose a void-chicken, which I should've expected hahah. Embroidering on a shirt is way harder than on a stiff tote-bag. The fabric is way more stretchy and if you're not careful, you'll stretch it too far and ruin the shirt. I also used water-soluble canvas for this one. After washing it off, it left a stain though. Now I don't know if the black yarn bled, or the waste canvas left a glue stain... Or both. I'm still going to try to get it out. Maybe I used it wrong. I wouldn't know since it didn't come with instructions 😅.
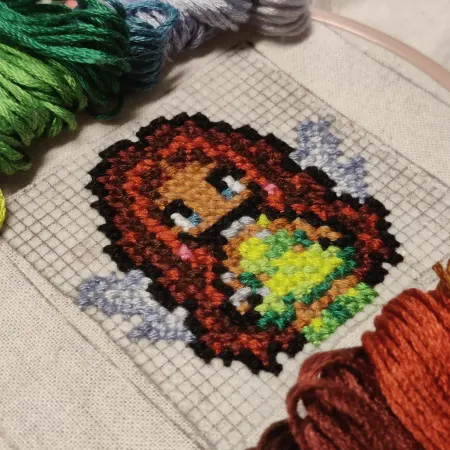
Layla
Layla (or Aisha) is such a badass character and the colors turned out so pretty! Only one more Winx to go... Tecna!
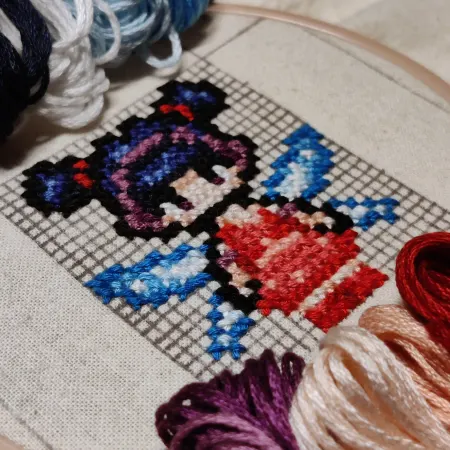
Musa
I share my love for music with Musa, which makes her also one of my favorites. I think she turned out really nice! I also have the feeling that my cross-stitching skills have been improving throughout my Winx Cross-Stitching journey!
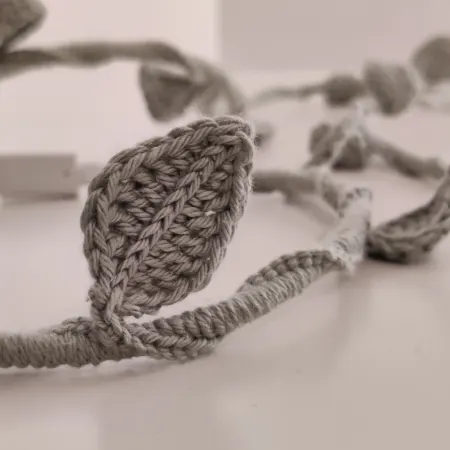
Ivy crochet cable cover 🌱💚
I didn't really like the boring cable in my car, so I pimped it with crochet 😁. ⚠️ Don't do this for charging cables! They can get hot and form a fire hazard. This is suitable for data-transfer only.
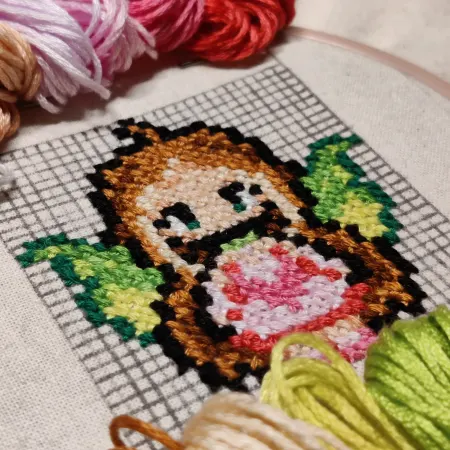
Flora
Aaaahhh she's my all time favorite and she turned out so pretty 😍. Only three more to go 😉. Also, no worries, the grid is going to disappear when I iron the bag, since I used a heat removable pen (Frixion).
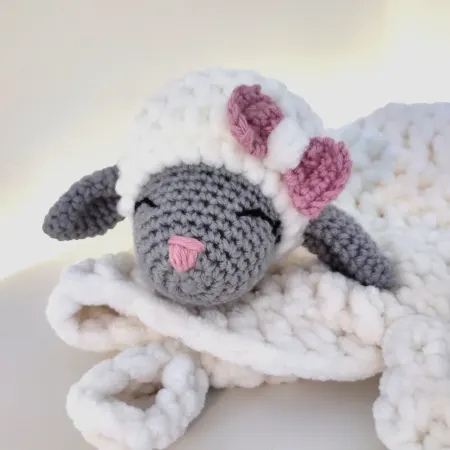
Lamb Lovey
I made this adorable lovey as a present for a baby girl. I'm so in love with how this one turned out 😍. IT'S SO FLUFFY I'M GONNA DIE. Enjoy the adorable pictures!
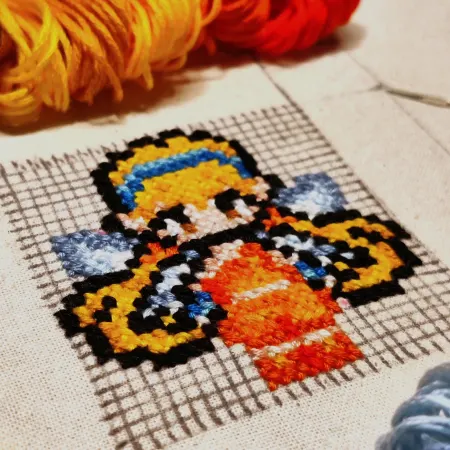
Stella
Here is my second attempt at cross stitch embroidery. It turned out so cute 🥺. I'm so excited to finish this bag and have all the Winx club characters on it 🥰.
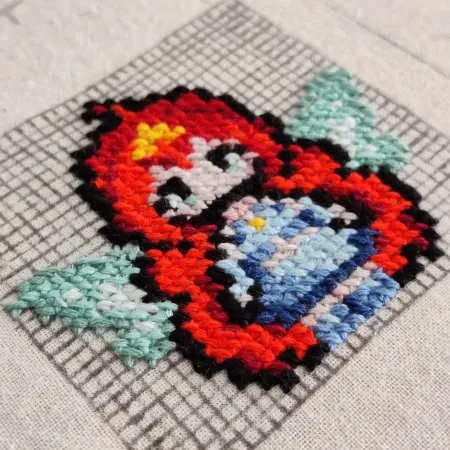
Bloom
I know this isn't crochet, but I was super excited to try out cross stitch embroidery for the first time! I think it would be really cool to embroider on clothing in the future as well, but I thought it would be best to practice my skills first on an old bag that shrunk in the wash anyway 😅. This was my first attempt at cross stitch embroidery. I didn't have a waste canvas or water soluble canvas, so I just drew on the grid myself with heat erasable pens (Frixion), which may have resulted in some uneven stitches. Either way I'm super proud of how my first attempt turned out. What do we think? 😁 Looking forward to the other Winx on my bag as well!
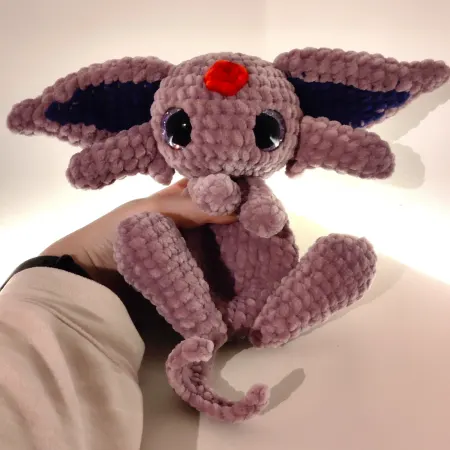
Espeon
We welcome Espeon to the family of eeveelutions! I'm so excited for the others!
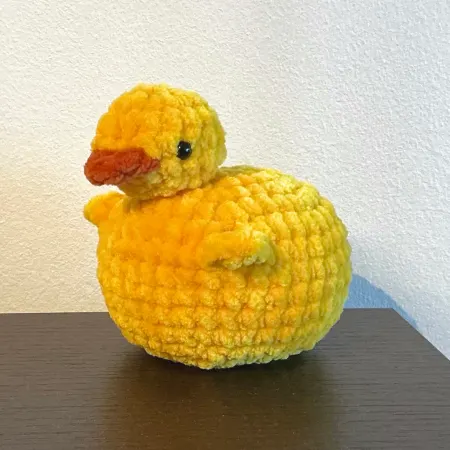
Chunky Ducky 💛
This is the very first full crochet pattern I designed from start to finish, and I'm so happy with how adorable it turned out! It's a quick and beginner-friendly project, and the best part is that there are multiple variations to choose from. Whether you want to make a classic rubber ducky, a goose, or another version, be sure to check out the different variants and create your favorite!
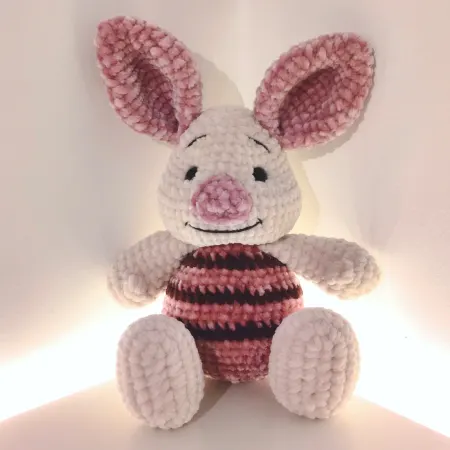
Piglet
This was a (joke) present for someone who had been replaying Piglet's Big Game on the PS2. We all know that feeling when we get distracted by something that we find while cleaning up. All jokes aside: They loved it!
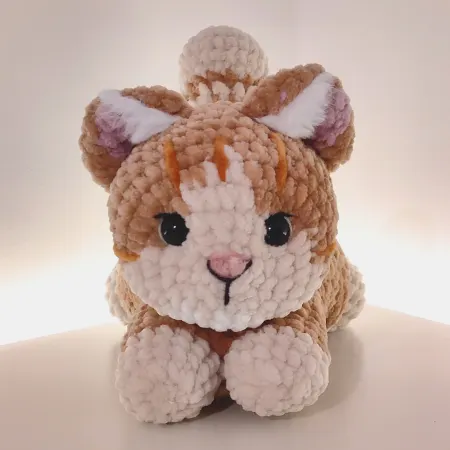
Raytje v3 🧡
Yes I made Raytje v2 again (which makes it v3), you're not seeing double 😂. I made this on request by my best friend so it could be given for the birthday of their sibling as well. I'm glad they're so happy with my creation!
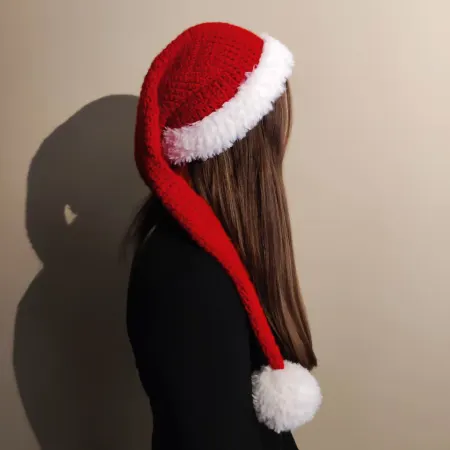
Santa Hat 🤍❤️
The faux yarn was a real challenge to deal with, but I think it turned out beautiful.
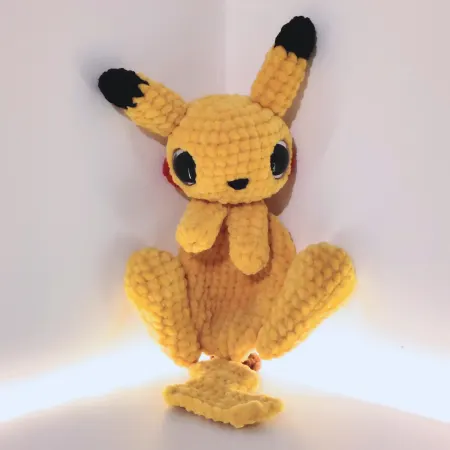
Pikachu
🤎💛 Pikachuuuuu ⚡ I'm not 100% happy with how this one turned out. I think the eyes are too far apart. But hey, that's my perfectionism speaking. Other than that, I think it turned out great!
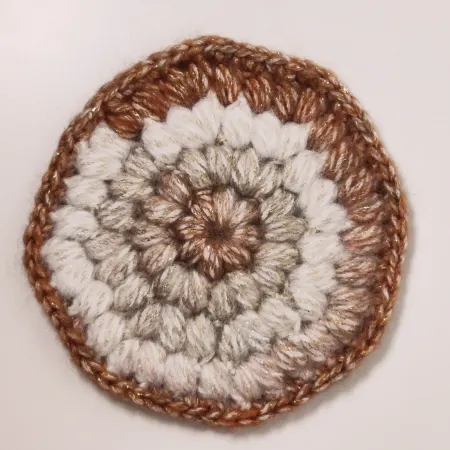
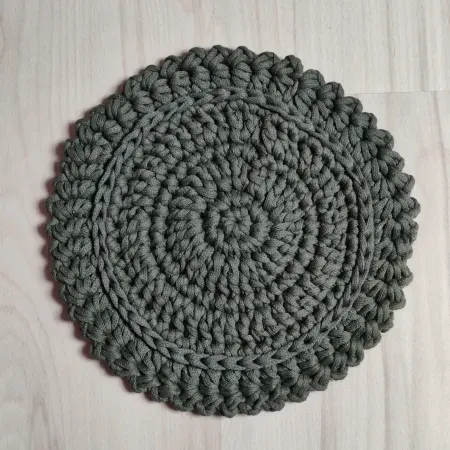
Coasters
I first tried the same pattern of the Sousplat Atacama, but I thought it didn't really hit the same in acrylic yarn, which made the coaster way too thin. I then tried a second type of coaster when I found a short tutorial on Pinterest (I've linked the original video though, not the repost). I was more satisfied with this one, but in black you can't really see the stiches that well. (I really had to put flash on and alter the images to make it possible to see the stitches 😅). I then found this GORGEOUS yarn in one of my local stores (Zeeman), that was this brown-white gradient yarn with a hint of gold (see it here). I fell in LOVE with this yarn. Bought 2 skeins, just to make coasters with 😂. I immediately made 8 of them, so now I definitely have enough coasters when my friends come over! (The time is per coaster.) However, since I was working with gradient yarn, it didn't look that pretty to go in rounds. That's why I decided to alternate rounds in between to keep the gradient effect better. I've also linked my way of doing it as a pattern for you to try out!
Sousplat Atacama
I made these with mixed fibers from Alison and Mae. I didn't know what 'mixed fibers' meant, but when I saw the yarn, I knew I wanted to make a coaster with it... A big one. I first tested it with a small piece of yarn to see if it could withstand heat and it did. I wanted to check if 'mixed fibers' also meant some type of plastic. Which if you expose it to heat, would melt. But luckily for me, it didn't! So now I have beautiful heat resistant coasters for my hot pans. The yarn is really sturdy, so pretty hard to crochet with. So halfway through the coaster your wrists will hurt. I altered the pattern a bit, because otherwise the coaster would be too big, since my yarn is bigger.
Shiny Umbreon
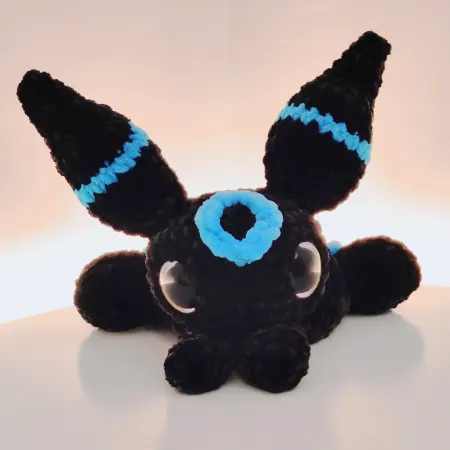
Welcome shiny Umbreon to the family. 💙🖤 I made this as a gift for my brother's birthday, since it's his favorite eeveelution.
Poképouches
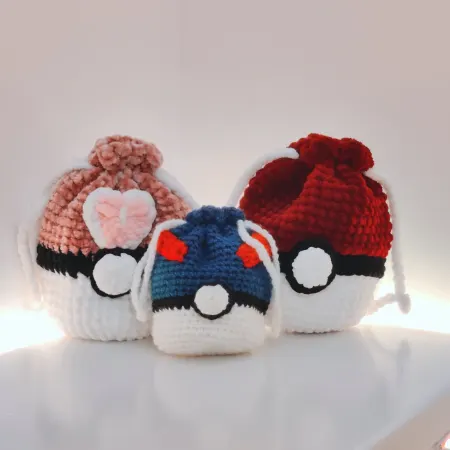
I have been experimenting a bit with different versions of poképouches (bags in the form of a pokéball). I have come up with a loveball design as well as a great ball one (that I still have to improve). However, I already wanted to show my progress and that I'm still crocheting 😝. I also tested out a new type of color change which looks SO clean, but it takes way longer to achieve 🥲. Yet the result is worth it since the regular PokeBall turned out really nice.
Raytje v2 🧡
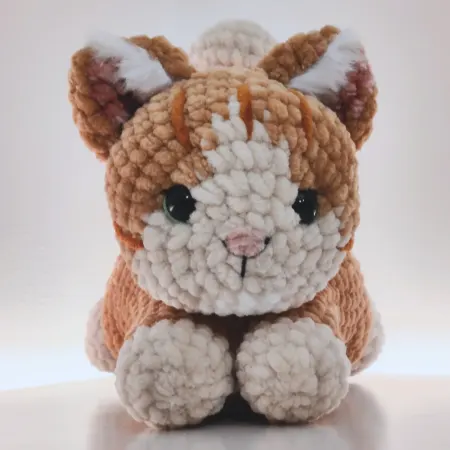
Alrighty, here is the second attempt at Raytje. This time I actually bought yarn to match the colors better and not just what I had laying around 😅. I also added ear details with faux yarn and used smaller eyes this time. I'm really satisfied with how this plushie turned out. It's really an upgrade from my previous attempt.
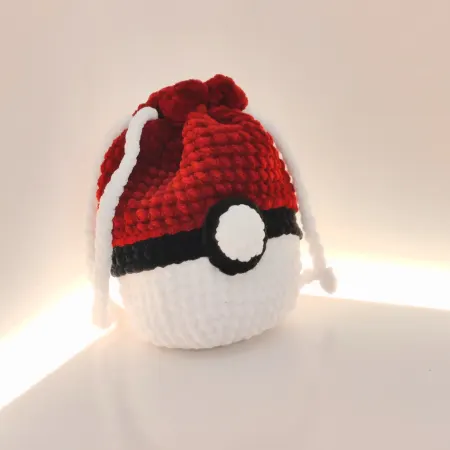
Poképouch
I have been experimenting a bit with different versions of poképouches (bags in the form of a pokéball). I have come up with a loveball design as well as a great ball one (that I still have to improve). However, I already wanted to show my progress and that I'm still crocheting 😝. I also tested out a new type of color change which looks SO clean, but it takes way longer to achieve 🥲. Yet the result is worth it since the regular PokeBall turned out really nice.
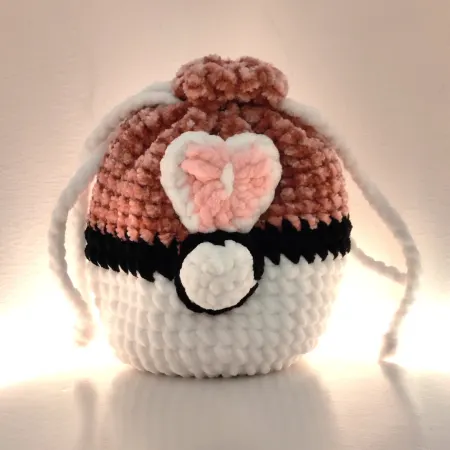
Poképouch - Love Ball
I have been experimenting a bit with different versions of poképouches (bags in the form of a pokéball). I have come up with a loveball design as well as a great ball one (that I still have to improve). However, I already wanted to show my progress and that I'm still crocheting 😝. I also tested out a new type of color change which looks SO clean, but it takes way longer to achieve 🥲. Yet the result is worth it since the regular PokeBall turned out really nice.
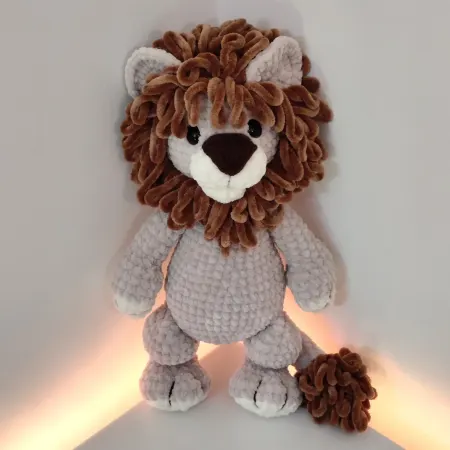
Levi the Lion
This was a pattern test. The pattern is really fun to work on since you don't have to attach the limbs by sewing, they are crocheted into the body! If you decide to make Levi (the lion) the mane does take some work, but the end result is so worth it!! Just look at him 😍. It was an adventure though, because halfway the body I ran out of yarn and it was out of stock 😩. So I started all over again and finished it just in time 😅. The pattern is released so go check it out!!
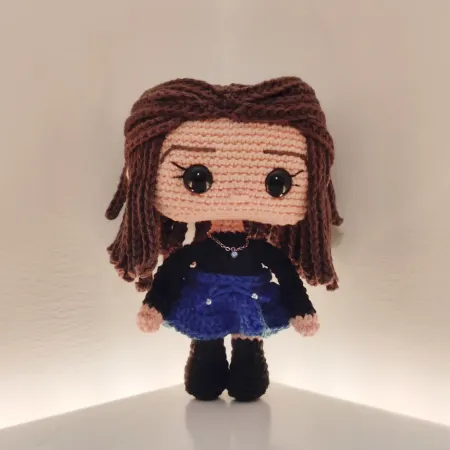
Mini Me
This Funko Pop-like doll is a mini version of myself, wearing one of my most iconic outfits. The people who know me personally will recognize it straight away 😝. I had to use a lot of new techniques, like blocking the hair, so I definitely learned a lot with this project. For the base of the doll; I followed a tutorial; but the skirt, the bow and the hair are freestyled 😅.
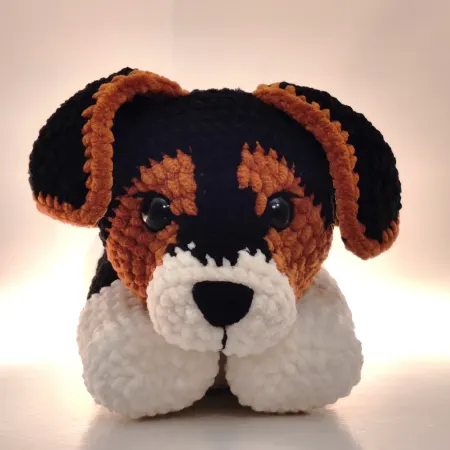
Luna
Here's my second attempt at a custom amigurumi. I made a plushie of the most energetic and cute puppy of one of my best friends. I'm really proud of how this one turned out. It is almost an exact copy 🥺.
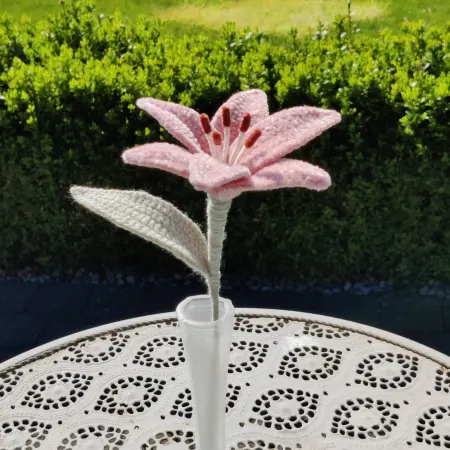
Pink Lily 💕
This concludes the first year of our amazing and loving relationship. The first year represented by a pink lily (my favorite flower) and with many beautiful years and flowers to come 🥰❤️💐.
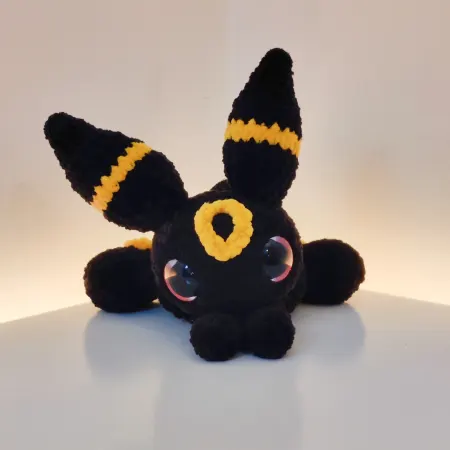
Umbreon
This baby was so fun to work on! I decided to do the color changes with a different technique to make the yellow stripes pop even more. I think it turned out great. I also think this one might be my favorite eeveelution so far.
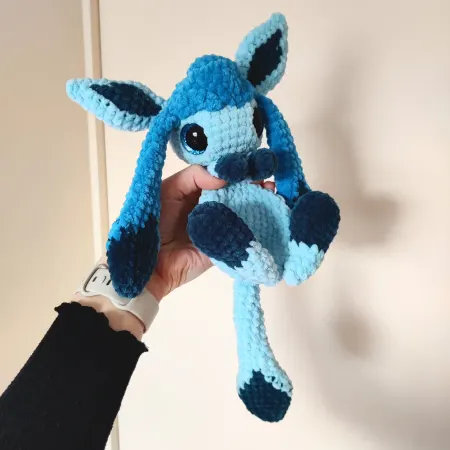
Glaceon
This beauty was a pattern test, and good news, the pattern is already released, so go check it out!! This pattern was super fun to work on and easy to follow. This was also my first ever test and I'm so happy I got to do this!! 🤍
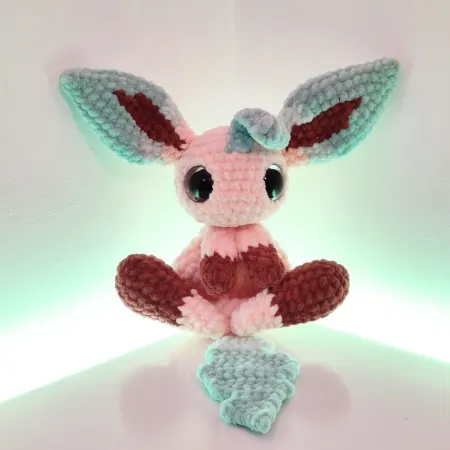
Leafeon
This is literally one of the cutest leafeon patterns I've ever seen. Once I found the creator I just HAD to buy it (maybe along with some other eeveelutions 🤫). It turned out so cute and I can't wait to make more eeveelutions from this creator!
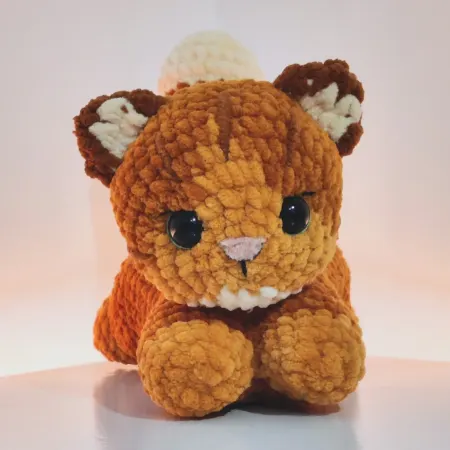
Raytje 🧡
I attempted to recreate the sweetest and cuddliest cat of my best friend. This is my first attempt at a custom amigurumi and I'm sure there will be more to follow. I'm pretty satisfied with the result, but I might attempt a second version with more accurate colors instead of just using what I had laying around at home 😅.
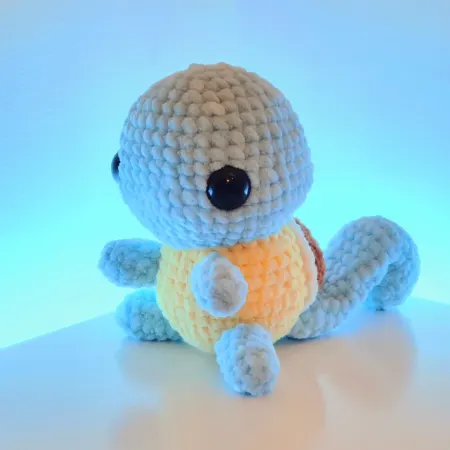
Squirtle
Welcome Squirtle to the family! 💙🤎🤍 This little baby stayed a WIP for a month or something because I was so occupied 😅. I really forgot how much fun crocheting is (except for sewing with chenille yarn 🥲).
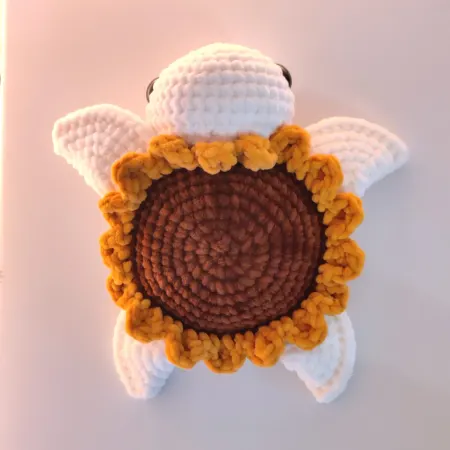
Sunflower Turtle 🌻💛🐢
The sunflower turtle that I've been wanting to make since forever, is done! 😁 Thanks to my amazing boyfriend who remembered this and got me the colors I needed for Christmas ❤️.
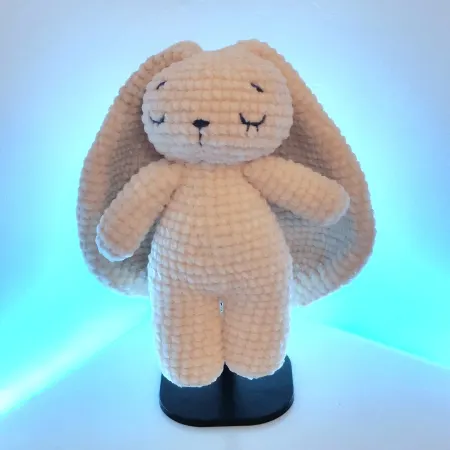
Sleepy Bunny 🤍💙🐰
A cute sleepy baby for my family of Amigurumi plushies. This pattern is actually made by me, but I got inspiration from other creators and I combined ideas to get this cute jumbo bunny.
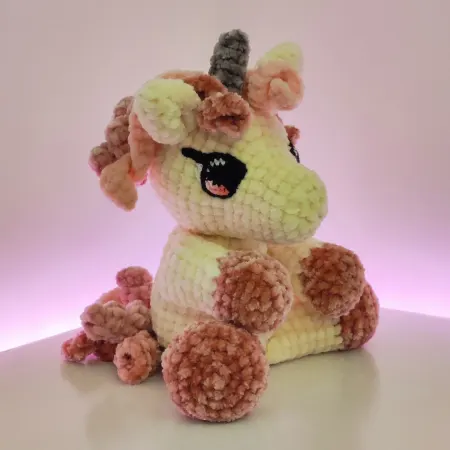
Poppy the Unicorn
Mini Poppy the unicorn 🦄💕 I also had to alter the pattern a little bit because safety eyes are not intended for little children. That's why I crocheted the eyes with embroidery thread and a 2mm hook 🙈. Now completely safe for kids!
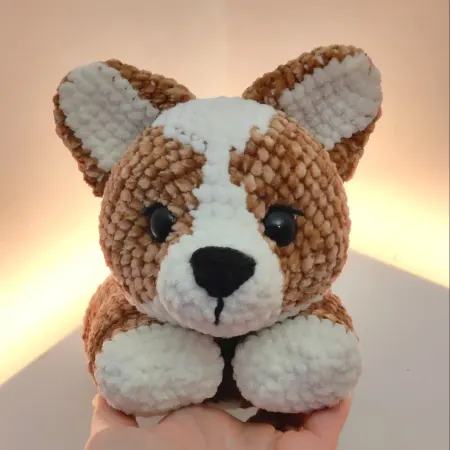
Little Biscuit
Welcome little Biscuit, to the family!!! 🐶❤️ I'm so excited to share the end result. I've wanted this pattern ever since I started to crochet and my amazing friends got me the pattern for my birthday 🥰. I was so excited that I immediately started on this little fella, and now we have this little cutie 😍. I'm extremely proud of what I made and I can't wait to make more!
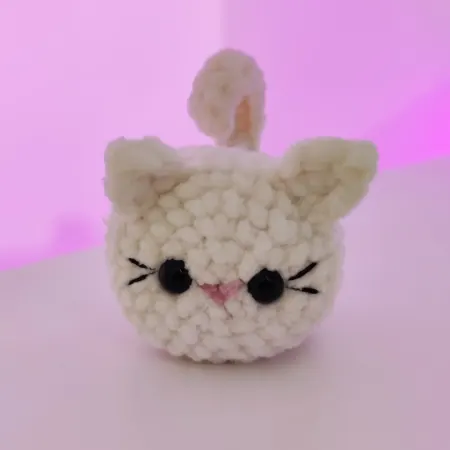
Cat Loaf
This is cat loaf version 2.0. This version with chenille yarn turned out way better than my previous one. It helps that this time I didn't forget to put in the safety eyes. It is pretty easy to make and SOOOO ADORABLE 😍.
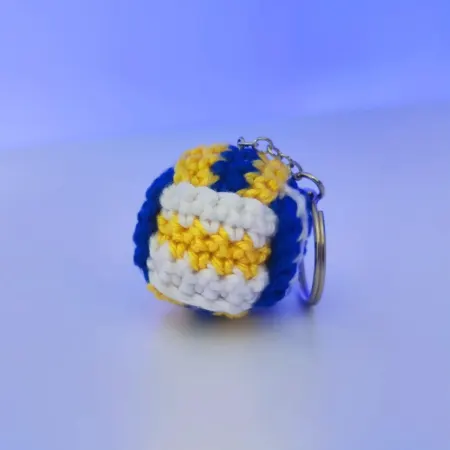
Volleyball Keychain
This was a fun little project. I know I'm a bit slow 😅, but that doesn't matter. I still enjoy it to the fullest and now we have a new keychain for the car key haha.
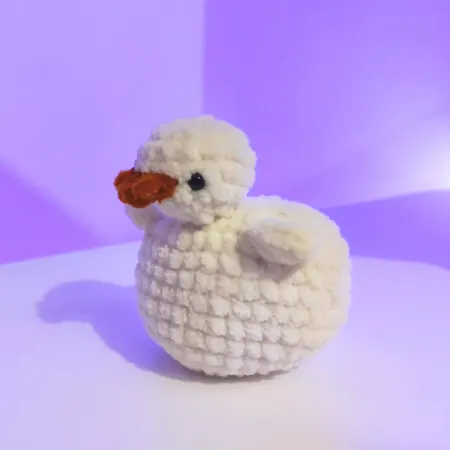
Goose 🤍🧡
This is the first full pattern I created by myself. It looks so adorable. It is also super easy to make and there are actually multiple versions available for this pattern! Go check it out!
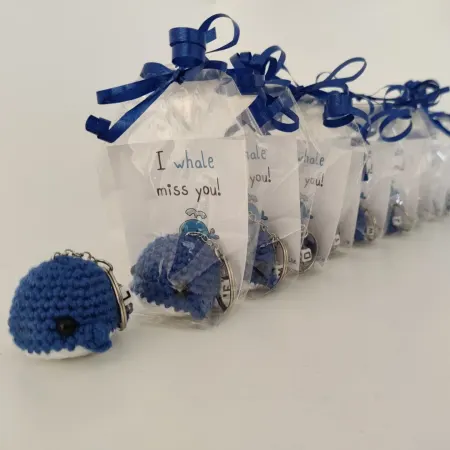
I Whale Miss You
'I whale miss you' whales 🐳. I made them as a parting gift for my bf and my friends. We were all studying together, but university came to an end for most of us. So this was my way of saying goodbye and wishing everyone good luck. I even put magnets in the one from my bf and mine, so they would stick together when brought closer. 🥰
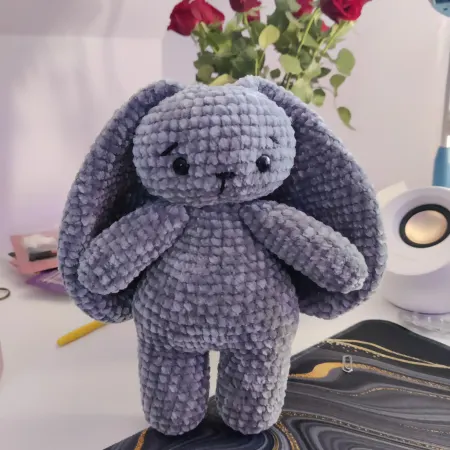
Bunny
This is the first time I kind of freestyled a pattern. I did take inspiration from some images I saw on Pinterest to create this adorable bunny. The shapes are relatively easy. The hardest part was getting the ears to look so adorable. They're just worked in rounds, so they're pretty heavy 😅.
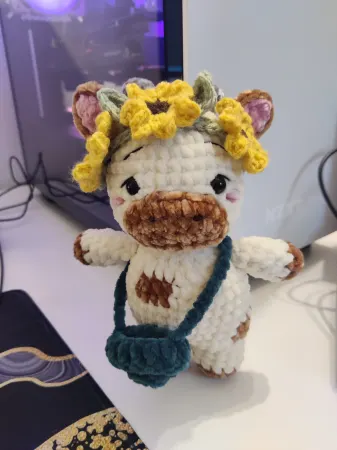
Cow 🌻🐮
I think this is one of the first amigurumis that I made. I found it pretty hard, also because I was following a YouTube tutorial on how to do it. So I constantly had to pause to see what was going on and then I didn't remember where I was. Plus, it was in Spanish 😅. However, I think it turned out pretty cute and I absolutely love the sunflower headband. I gifted this one to my mom, who absolutely adores it.
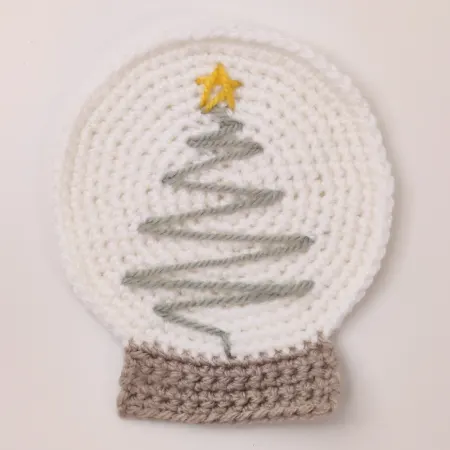
Christmas Coaster
I really liked this Christmas snow globe coaster that I found as inspiration on Pinterest. However, I was too lazy to make multiple ones, so I only have one Christmas themed coaster 😅.
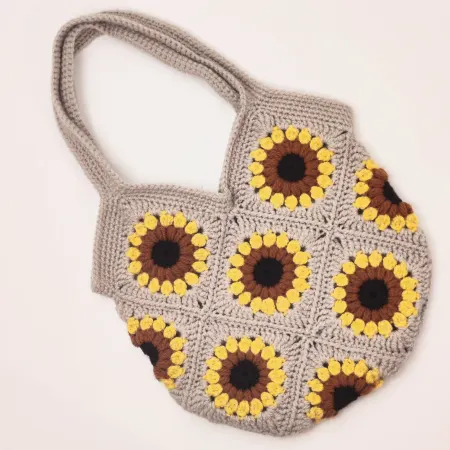
Sunflower Tote bag 🌻💛
I really love sunflowers! The yellow and the brown just make the colors pop! I'm a bit sad with how tiny this bag turned out. It fits like 3 maybe 4 skeins of yarn 😅. I imagined it more as a beach bag, but now I have an excuse to make another one.
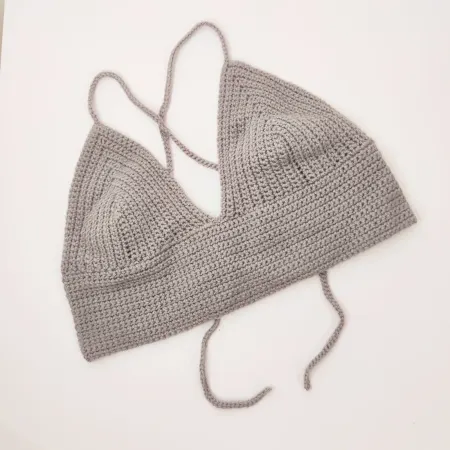
Bralette
This is my first ever crochet wearable that I made. However, as with every first time doing something, I made a mistake. I made the corset flaps too long so I can't pull the top tight enough around my back 😅. It was still fun to do and I sometimes still wear it on a lazy day.
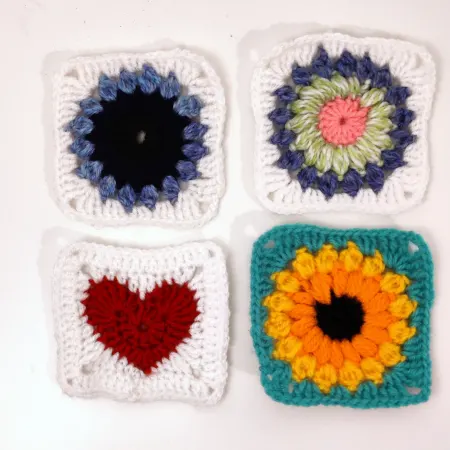
Granny Squares
Ah yes, it's completely logical to start to learn how to make granny squares AFTER you've made a bunny amigurimi in faux yarn. But you know what, I don't have to be logical 😅. Anyway, I used up some more of my scrap yarns that I had laying around. I really wanted to make a sunflower granny square, but I didn't have the correct colors. So I just used yellow, orange and black. Safe to say I was really disappointed with how it turned out. It didn't even look close to a sunflower. But either way, this was a good training for the sunflower bag that I wanted to make.
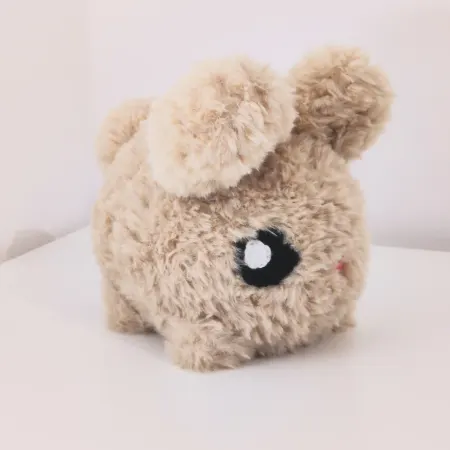
Fluffy Bunny Loaf
Seeing my first amigurumi project (my octopus) was a success, I decided it was time to attempt the impossible. I actually had already bought this faux yarn before I even learned how to crochet. I saw this yarn in the store and thought: I want to learn to crochet so I can make a bunny with this. So I learned to crochet by watching some YouTube video's on basic stitches. Tried one basic amigurumi project and thought yes I'm ready now... Safe to say I was not. Damn faux yarn is difficult to work with. You can't see it but my stitch count is completely off. You can't see ANYTHING. But the positive thing is: You can't see your mistakes either 😁. I still didn't have safety eyes and my buttons weren't big enough to fit this project, so I freestyled some crochet eyes. I think he looks a bit derpy, but that's okay. I really like my fluffy bunny loaf. Still proud to this day that I was able to pull this off as my second amigurumi project. (And I did it with faux yarn 🙈.)
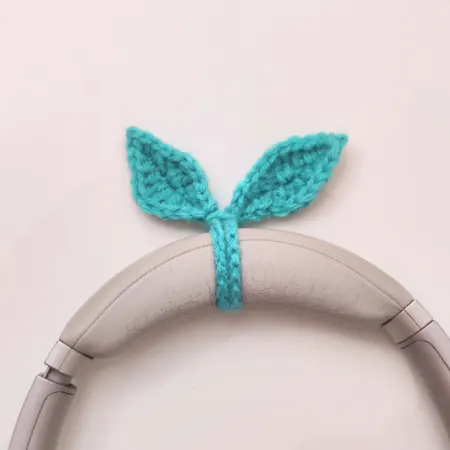
Headphones sprout
This was my first project after learning the basic stitches, which is pretty decent as a first project, not too hard, not too easy. Plus, I could make my headset absolutely adorable while gaming. I could really match the Among Us vibe from then.
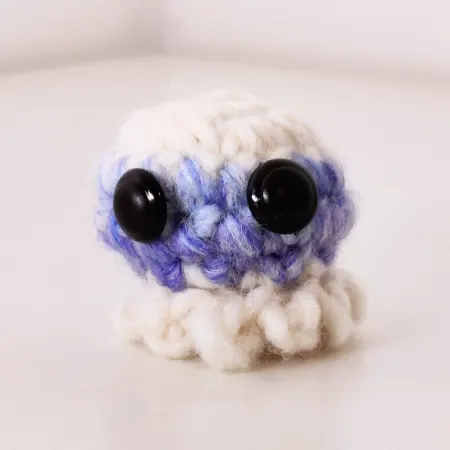
Octopus
This is my first ever amigurumi project. I did make the sprout before, so I already got the hang of the basic stitches. You basically only need a single crochet for amigurumi (cope). I just used some yarn that I had laying around. I didn't have safety eyes yet, so I just used some cardigan buttons that I had and sewed them into the head. Whatever works, works.
No creations match the selected filters.